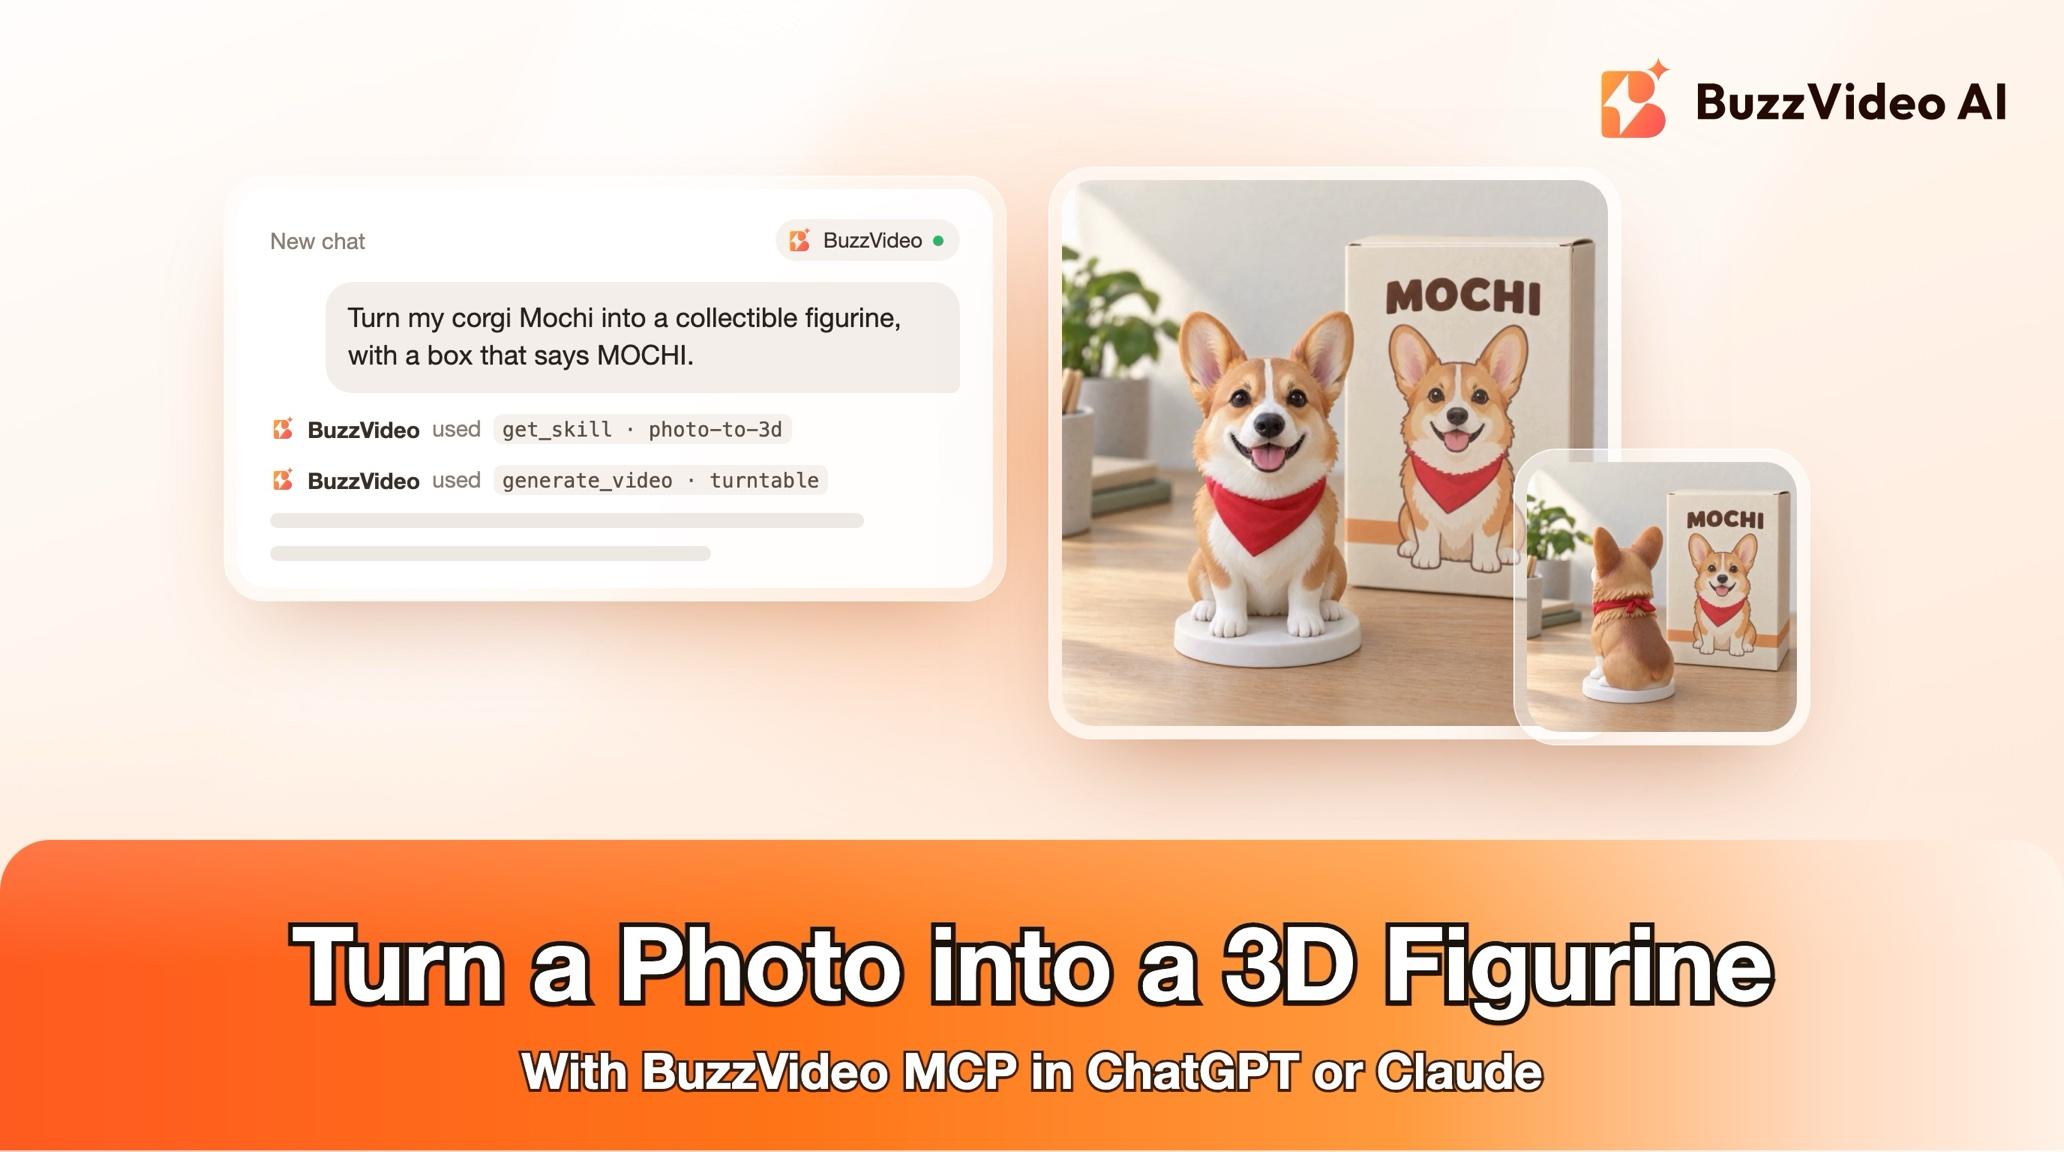
How to Turn a Photo into a 3D Figurine or Model in ChatGPT or Claude
Turn a photo of a pet, person, mascot or product into a 3D figurine look, angle set and turntable inside ChatGPT or Claude with BuzzVideo MCP.
To turn a photo into a 3D figurine with AI, start from one clear, well-lit photo of the whole subject, generate a stylised hero image of it as a vinyl or resin figure on a base, then make the other angles and a slow turntable video from that one master so the figure never changes. With BuzzVideo MCP you can do this from ChatGPT or Claude: the chat follows BuzzVideo's Photo to 3D guide, tells you up front whether you will get a real 3D model file or a "3D look", and only spends credits after you approve the plan.
That honesty matters. BuzzVideo generates images and videos that look 3D, but it has no 3D-model generator of its own, so on its own it cannot give you a file to 3D-print or drop into a game. This guide shows each step, when a real model file is possible, the prompt to copy, what it costs and the review checks that keep the figure identical from every side.
What is a photo-to-3D figurine?
It is your pet, mascot, a person or a product shown as a collectible toy: a stylised figure on a base, often next to a collector box with its name on it. Brands use it for mascot launches, merch mock-ups and "what if our product were a toy" posts.
| Part | Typical choice |
|---|---|
| Source | One clear photo, whole subject visible, 1000 px or more on the long side |
| Style | Stylised figurine by default (vinyl toy, chibi, resin statue or clay) |
| Images | Front, three-quarter, side, back and a hero shot, 1:1 by default |
| Box | Window box or closed box with the confirmed name, never a real toy brand's look |
| Video | Slow 360° turntable, 9:16 by default, 5–10 seconds |
| What it is | A 3D look, unless a real 3D tool or model file is involved |
Try it: connect BuzzVideo to your AI chat once, then send a photo and ask for a figurine. Connect BuzzVideo MCP →
What do you need before you start?
- A BuzzVideo account. Images work on every plan; the turntable video needs Starter or above (pricing).
- BuzzVideo MCP connected to ChatGPT, Claude or another MCP client — see how to use BuzzVideo MCP in ChatGPT and Claude.
- One clear, well-lit photo with the whole subject in frame, at least 1000 px on the long side. Side and back photos help a lot.
- The exact name and text you want on the base or box, and the rights to use them. No public figures, celebrities or characters you don't own.
- Optional: a 3D model file (.glb, .gltf, .obj, .fbx, .stl, .blend or .usdz) if you already have one, or an image-to-3D tool you already use.
How do you turn a photo into a 3D figurine step by step?
Step 1 — Ask, and hear what is actually possible
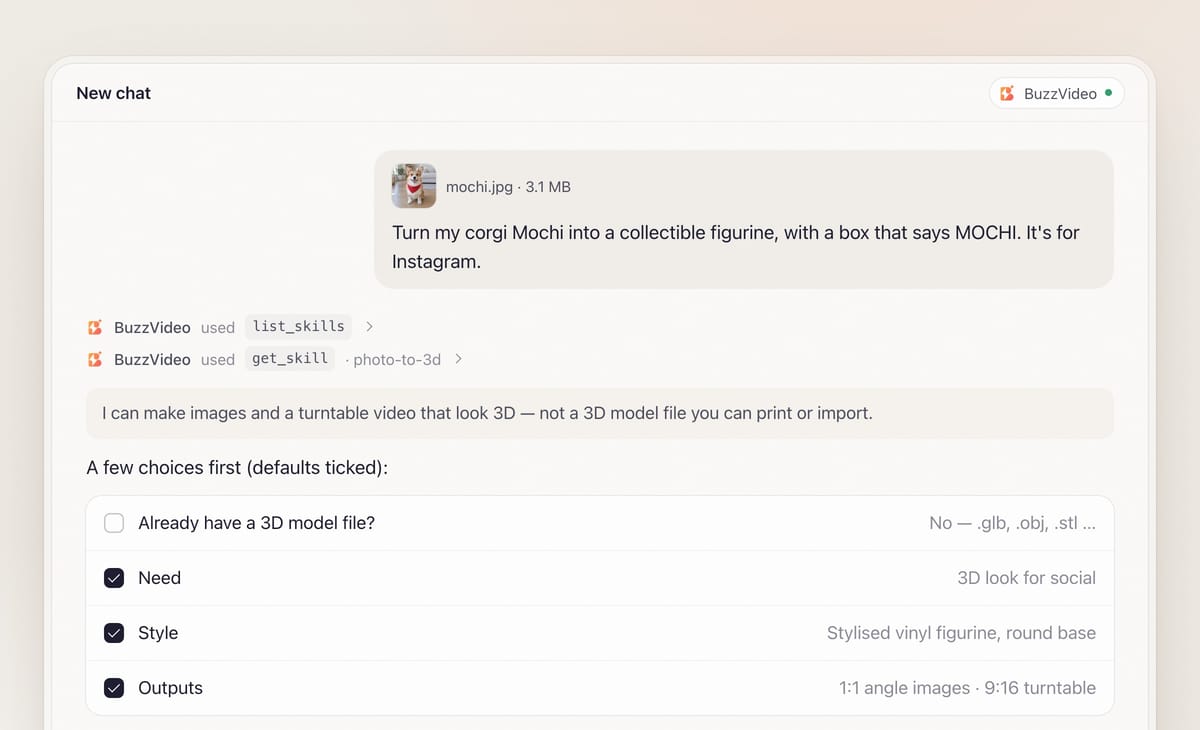
Attach the photo and say what you want in one message. When BuzzVideo MCP is connected, the chat looks up BuzzVideo's guides (list_skills) and loads the Photo to 3D one (get_skill). Its first sentence back is the honest one: it can make images and video that look 3D, not a model file you can rotate, print or import.
It then asks, in one round with defaults you can accept: do you already have a 3D file, do you need a real model or a 3D look for social (default: the look), which style (default: stylised figurine), and which outputs and ratios (1:1 images, 9:16 video).
Step 2 — The guide picks one of three routes
| Route | When | What you get |
|---|---|---|
| 1. Render your model | You already have a 3D model file and the chat can run commands on your computer | Real renders and a turntable of your actual model |
| 2. Image-to-3D tool | A local or third-party image-to-3D tool is installed or one you already use, and you agree to send it the photo | A real model file, checked for holes, broken geometry and smeared textures, then rendered |
| 3. 3D look | Neither of the above (the usual case) | Angle images, a figurine and box shot and a turntable video, named 3D-look |
The guide never signs up for services, enters passwords or installs software without your OK. The rest of this walkthrough covers route 3, where most people end up.
Step 3 — Confirm the names and approve the image plan
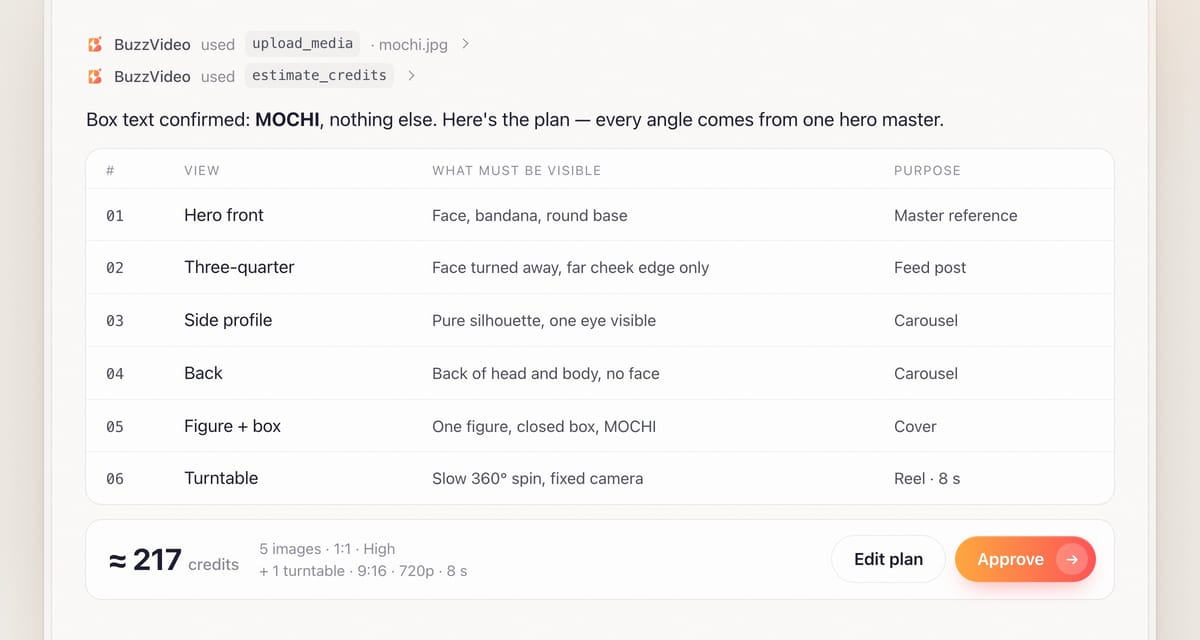
The photo is uploaded and the guide writes one subject description it will reuse in every prompt: face shape, fur or hair, colours, outfit, accessories, markings. It lists every name and line of text that will appear on the figure, base or box and asks you to confirm it; anything it can't read, it asks about instead of guessing.
Then you see a table of images (angle, style, background, ratio, purpose) with the figure, base and box details, plus a quote from estimate_credits. By default the box shows exactly one figure in a white moulded tray, straight on, because clear windows with a second copy of the figure tend to come out with a ghost double. A tagline only appears if you wrote or confirmed it.
Step 4 — Generate the hero first, then the angle set
The hero front image is generated first and shown to you; it becomes the master reference. The other angles are then made in one batch from your photo plus that master, with identical background, light and scale.
Image models tend to under-rotate, so the guide describes what must be visible rather than degrees: for a back view, "back of the head and body only, no face visible". Backs and sides are invented from the front photo, and the guide says so.
Step 5 — Make the turntable video
The master plus the side and back images are the references for a 5–10 second video: the figure rotates slowly through 360° on its base, with a fixed camera, the same light and a plain background. Slow is deliberate, because fast spins make the subject drift. For music, captions and an end card, the guide hands over to its Video editor guide.
Step 6 — Review and delivery
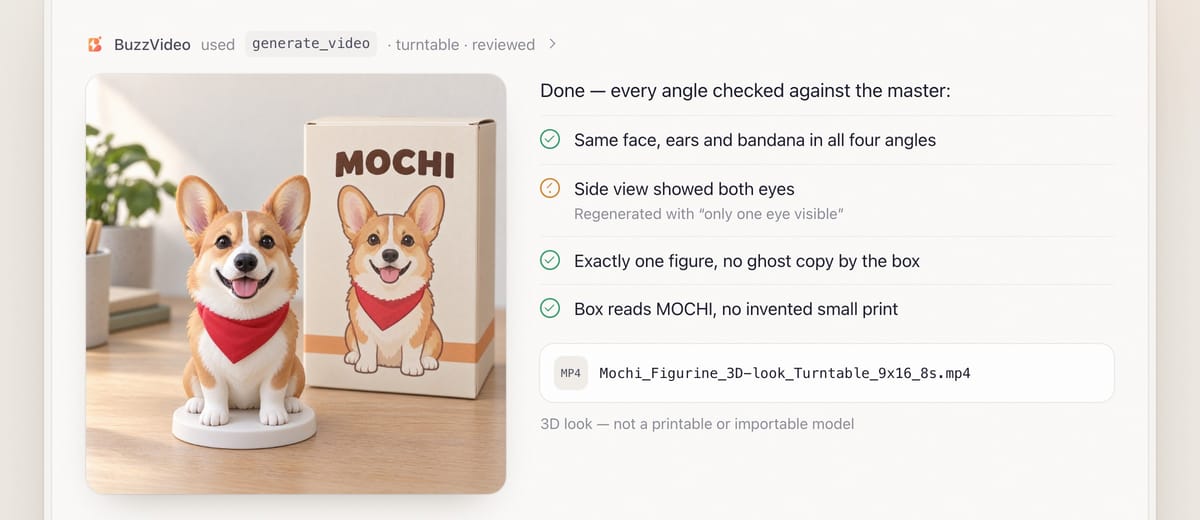
Review is mandatory. The angles are compared side by side for the same face, colours, outfit and base; side views are checked for limbs in the right place; box shots for a ghost second figure; the turntable frame by frame as the back comes round; and every letter on the box against the confirmed text.
You get the files in one project folder, named with 3D-look, never "model" (for example Mochi_Figurine_3D-look_Turntable_9x16_8s.mp4), plus a note of the route used, the models, the credits spent, what review fixed and what you still need to confirm. Everything is also saved to your BuzzVideo asset library.
Copy-paste prompt
“Turn this photo of [my corgi Mochi] into a [stylised vinyl figurine] on a [round base with a name plate], next to a [closed collector box] that says [MOCHI]. I need [a 3D look for Instagram], not a printable model. Make [front, three-quarter, rear three-quarter and hero] images in 1:1 and an [8]-second 9:16 turntable. Show me the text list, the image plan and the credit quote before generating.”
Which photo works best for a 3D figurine?
| Check | Why it matters | Good example |
|---|---|---|
| Whole subject in frame | Cropped ears, paws or feet get invented | Pet sitting with floor space around it |
| Even, soft light | Hard shadows read as dark patches on the figure | Window light from one side |
| Front-facing | The front becomes the master for every angle | Eyes to the camera |
| Extra side and back photos | Otherwise the back is an interpretation | Two more quick shots |
| Readable text | Names on the box are copied from what you confirm | Type the name in your message |
What usually goes wrong, and how does the guide prevent it?
| Problem | What you notice | What the guide does |
|---|---|---|
| Expecting a real model | "Why can't I 3D-print this?" | Says up front what is possible; names files 3D-look |
| Drift between angles | Different face or colours from the side | One master image and one subject description for every angle |
| Under-rotated views | "Side" view is really three-quarter | Describes what must and must not be visible |
| Stub arms | An arm grows from the chest in profile | Swaps the side view for a rear three-quarter view |
| Ghost figure in the box | A faint second copy in the window | One figure in a white tray, or a closed box |
| Misspelt box text | Wrong letters on the name plate | Text confirmed first; checked letter by letter |
How much does a photo-to-3D figurine cost?
You pay in BuzzVideo credits, and the guide quotes before generating. As a rough example, a hero image, three more angles and a figure-and-box shot at High quality on GPT Image 2.5 Sunburst (8–10 credits each) plus an 8-second 9:16 turntable on Seedance 2.0 Fast at 720p (167 credits) comes to about 220 credits — around $1.55 on Pro billed yearly. Images only cost far less. Rates are on our pricing page; for the full math see BuzzVideo pricing and cost per ad.
Which BuzzVideo guide should you use instead?
| You want… | Use this guide |
|---|---|
| A figurine, toy or 3D-look version of a photo | Photo to 3D (this one) |
| A product 360° or exploded-view showcase video | 3D product video |
| Directed story shots with planned camera moves | 3D director |
| A clean product photoshoot | Product photos |
Step-by-step guides: 3D product video · 3D director · Product photos
You don't need to name the guide: describe what you want, and the chat picks the matching one. For short videos made from product photos, see product demo videos from photos.
Ready to see your pet, mascot or product as a collectible? Connect BuzzVideo to your AI chat and send one good photo.
FAQs
Can I 3D-print the figurine?
Only if you end up with a real model file. That happens on route 1 (you supply a 3D file) or route 2 (an image-to-3D tool on your computer or one you already use). The usual route 3 delivers images and video that look 3D; they can't be printed or imported, and the guide says so.
Can I use a photo of a celebrity or a famous character?
No. The guide does not make 3D likenesses of public figures or celebrities, and it won't use logos, trademarks or characters you don't own. Your own face, your pet, your mascot and your products are fine.
Why is there no pure side view in my set?
If the subject has arms or wings sticking out, a true profile shows them pointing at the camera, where they read as a stub. The guide replaces that view with a rear three-quarter view, about 135° round, and tells you why.
Can it make a boxed action figure?
Yes. You can choose a window box or blister card with your confirmed name and accessory slots. The guide never imitates a real toy brand's packaging and leaves space rather than inventing small print.
What do I get at the end?
On route 3: the angle images, the figurine and box image and the turntable video in one folder, named 3D-look, plus the models used, credits spent and what review caught. On routes 1 and 2 you also get the model file, its format and any problems found in it.
Last verified: November 2, 2026, against our live pricing and product pages.
Next reads: How to use BuzzVideo MCP in ChatGPT and Claude · Product demo videos from photos · What is BuzzVideo AI?

About the author
Monica
Product Manager
As a Product Manager at BuzzVideo AI, I work with marketers and growth teams on AI ad workflows—from brief to shippable creatives. I write about practical product workflows, model choices, and how teams turn product pages into ads that feel native on Meta and TikTok.