How to Make a 360° 3D Product Video with AI in ChatGPT or Claude
Step-by-step: make a 360° spin, exploded view and light-sweep product video in ChatGPT or Claude with BuzzVideo MCP and its 3D product video guide.
To make a 360 product video with AI, start from a clean product photo (and a back view if you have one), plan one slow turn that starts and ends on the label, add an exploded view or a light sweep, and cut it into a 10–20 second vertical showcase. With BuzzVideo MCP you can do this from ChatGPT or Claude: the chat follows BuzzVideo's 3D product video guide, confirms your label and part names, shows a shot list with a credit quote, and only generates after you approve.
If your AI chat can run commands on your computer, the guide first builds a real 3D scene for the spin and exploded view, at no credit cost; if not, it generates from your photo. Below: each step, a prompt to copy, the shot plan, the cost and the review checks.
What is a 3D product video?
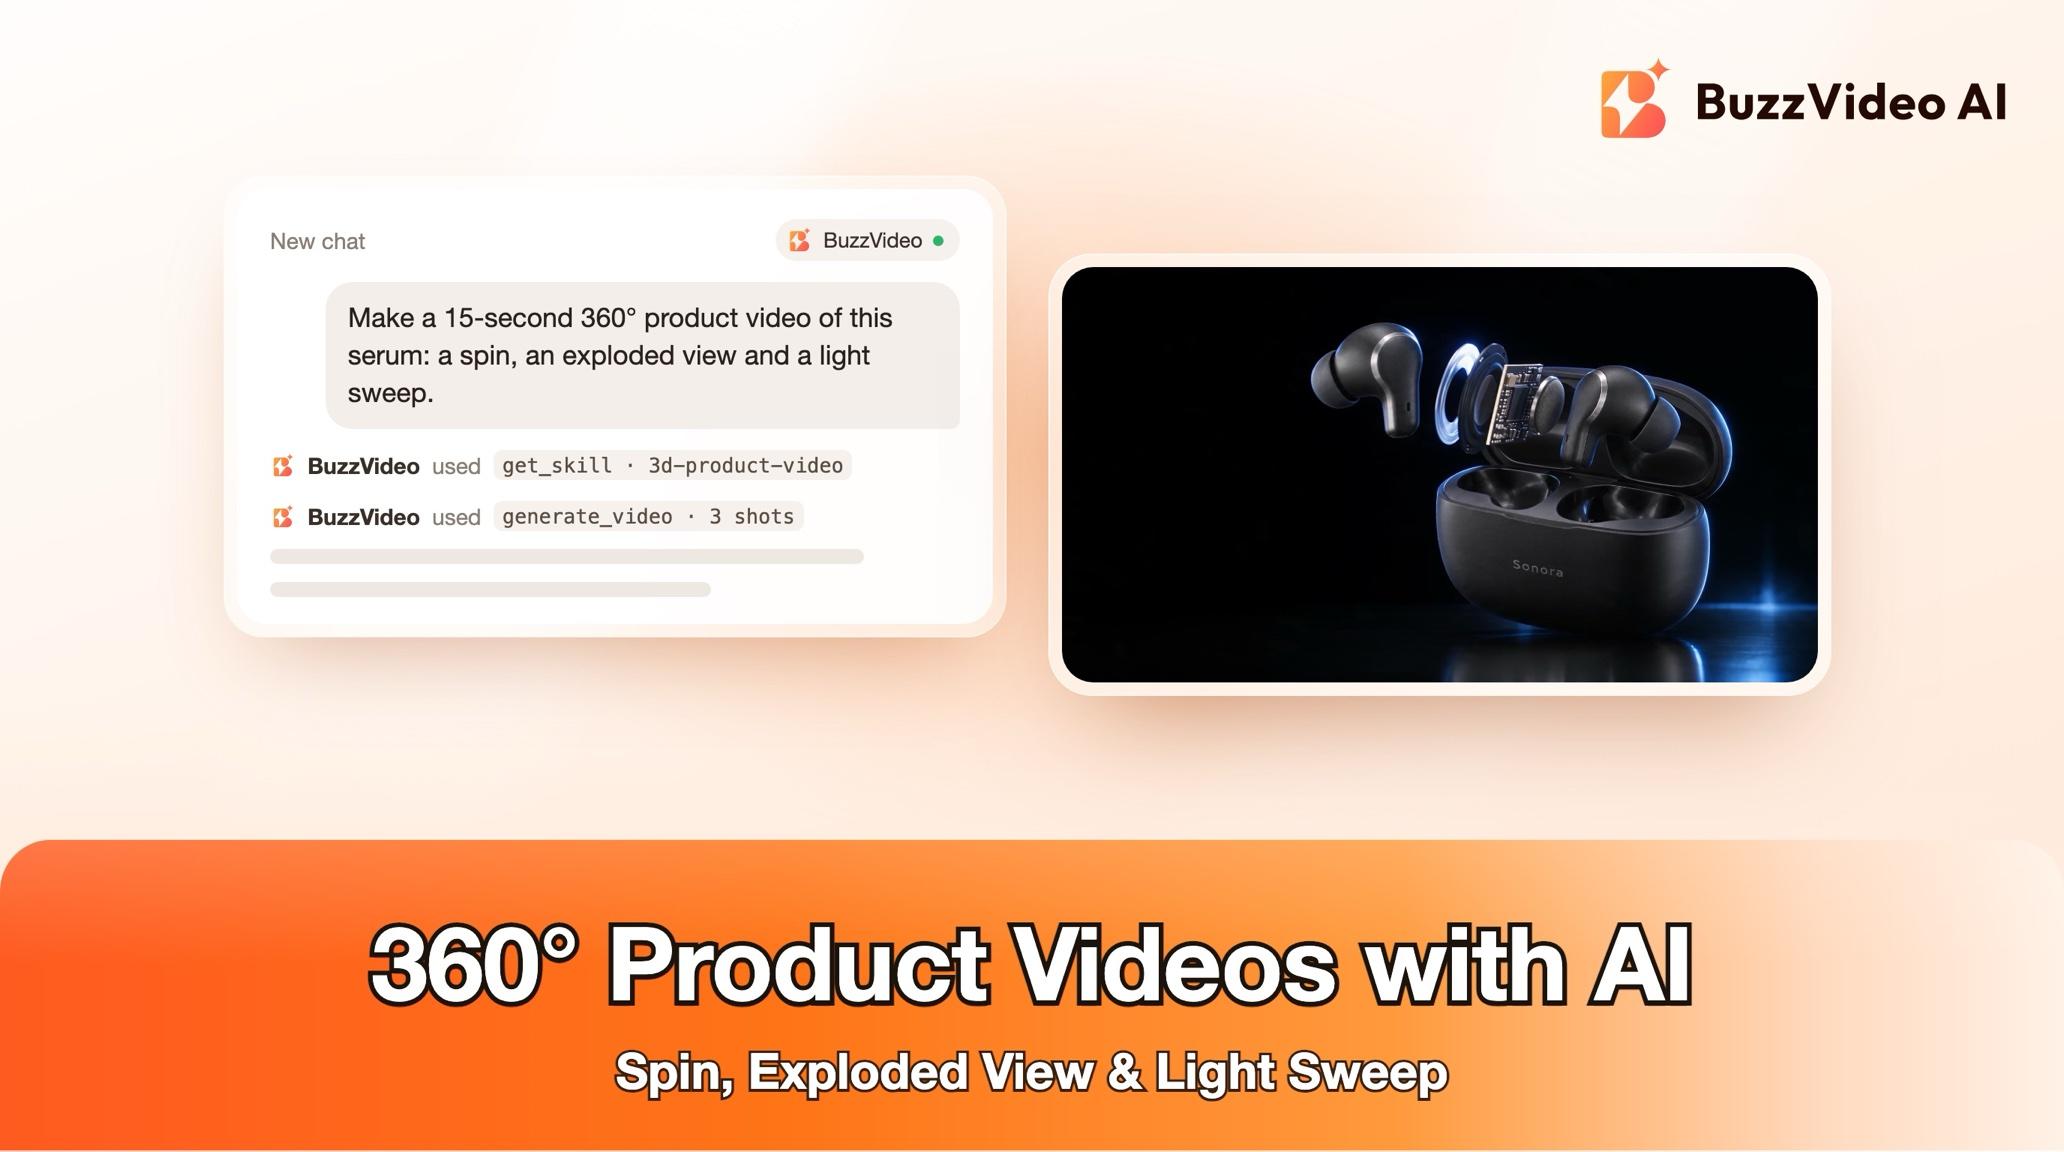
A 3D product video is a short CGI-style showcase of the product alone: it turns on a plinth, comes apart to show its parts and catches light across its surface. No people, no lifestyle scene. It suits hard goods: gadgets, bottles, jars, cosmetics, shoes and packaging.
| Part | What the guide does by default |
|---|---|
| Length | 15 seconds (10–20 s range) |
| Format | Vertical 9:16 |
| Shots | Turntable + light-sweep hero + end card; exploded view only when you name the parts |
| Background | Dark studio gradient (or white seamless, or your brand colour) |
| Turntable | One 360° turn over 4–8 s, starting and ending on the label front |
| Lens and light | 50–85 mm look, three-point light plus one moving light for the sweep |
Try it: connect BuzzVideo to your AI chat once, then send a product photo and ask for a 360° showcase. Connect BuzzVideo MCP →
What do you need before you start?
- A BuzzVideo account with video. Video starts on Starter; Seedance 2.0 and 2.5 need Pro or Ultra (pricing).
- BuzzVideo MCP connected to ChatGPT, Claude or another MCP client — see how to use BuzzVideo MCP in ChatGPT and Claude.
- A clean front photo of at least 1000 px, plus a back view for a full turn (a photo, or a phone video of the product turned in hand).
- A 3D or CAD file if you have one (.glb, .gltf, .obj, .fbx, .stl, .blend or .step) for the most accurate spin.
- The facts: size or volume, cap colour and finish, and real part names for an exploded view.
How do you make a 360 product video step by step?
Step 1 — Ask in your AI chat and pick a route
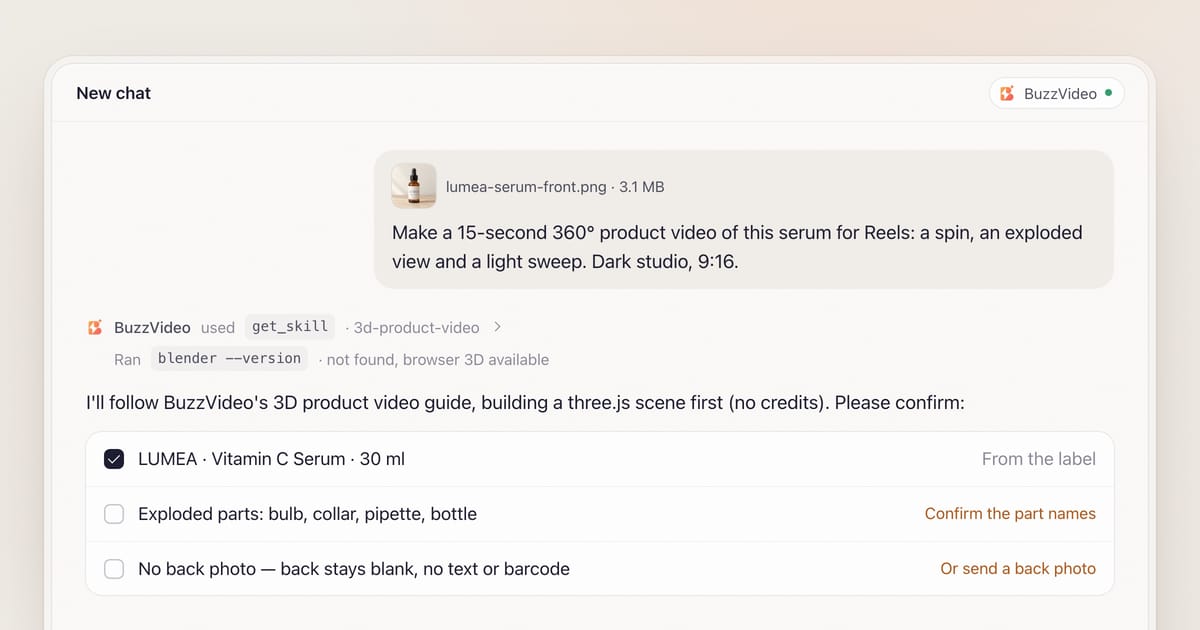
Attach the photo and describe the video in one message. The chat loads BuzzVideo's 3D product video guide (get_skill) and asks anything missing in one round, with defaults, including the editing style: fast-cut, premium brand, beat-synced, or learned from reference videos. Then it names its route and why:
- A — Blender. The chat can run commands and Blender is installed. Best for exploded views and clean turntables.
- B — browser 3D. It can run commands but has no Blender, so it builds a three.js scene and captures frames in a headless browser.
- C — generation only. It can't run commands (typical in a web chat), so it generates from your photo and says plainly that exact parts and true 360° geometry aren't guaranteed.
It never installs software without your OK.
Step 2 — Confirm the label, the parts and the back
The guide lists the brand, product name, claims and part names it read and asks you to confirm them. Unclear text gets a question, not a guess, and it never invents internal parts.
With no back photo, the model invents the back, so you agree a look first. The default is completely blank: same colour and finish, no text, logo, barcode or QR code. Asking for "a little fine text" makes models invent a full ingredient panel.
Step 3 — Build and render the 3D scene (free)
On routes A and B, the chat imports your 3D file or builds a simple proxy matched to the photo's proportions; the proxy only guides camera and motion. The turntable spins once and ends on the label. The exploded view moves your confirmed parts apart along one axis with even gaps, never passing through each other.
It renders three to five keyframes per shot at 1080×1920, then clips joined with ffmpeg. Re-rendering is free, so fixes happen here, not in paid generation.
Step 4 — Approve the shot list and the credit quote
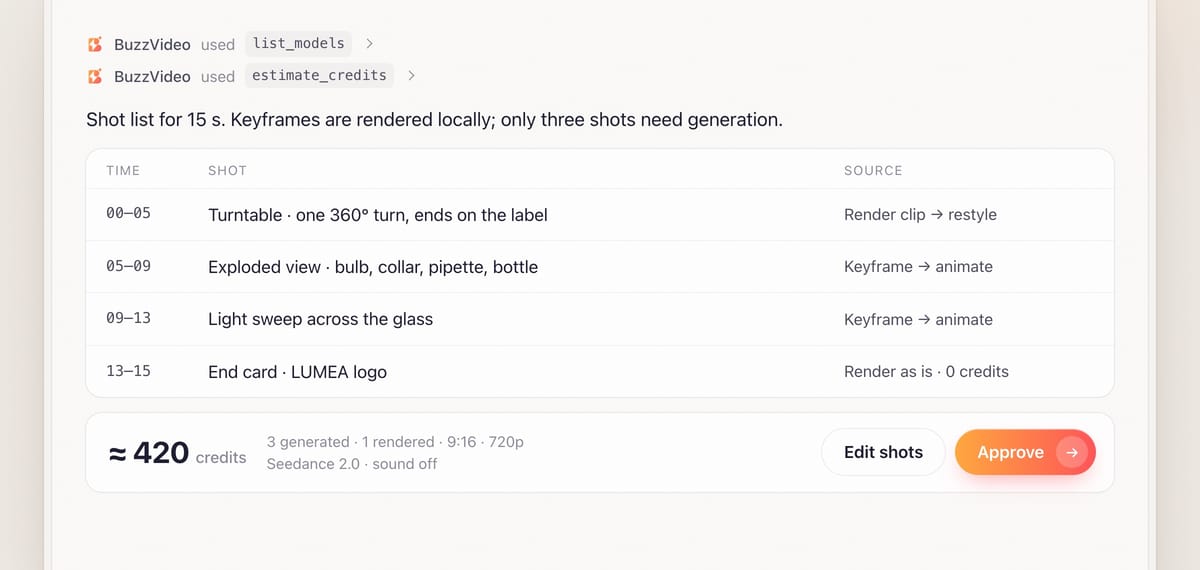
You get every shot with its duration, type, source (render as is, render made photoreal, or generation only), camera move and any caption, plus the keyframes and a quote from estimate_credits. Nothing is generated until you say yes.
Step 5 — Generate the photoreal shots
Renders control motion; generation adds real materials and reflections. A render clip is restyled, or a keyframe animated with "first frame identical" wording. Renders live on your computer, so the chat asks you to upload the named files; if you can't, it generates a matching still and warns that motion now follows its words only.
On route C, motion stays simple: a slow orbit, push-in or light sweep, with one slow 360° over five seconds or more. Label close-ups use the render or your real photo. Shots contain no text.
Step 6 — Edit, review and deliver
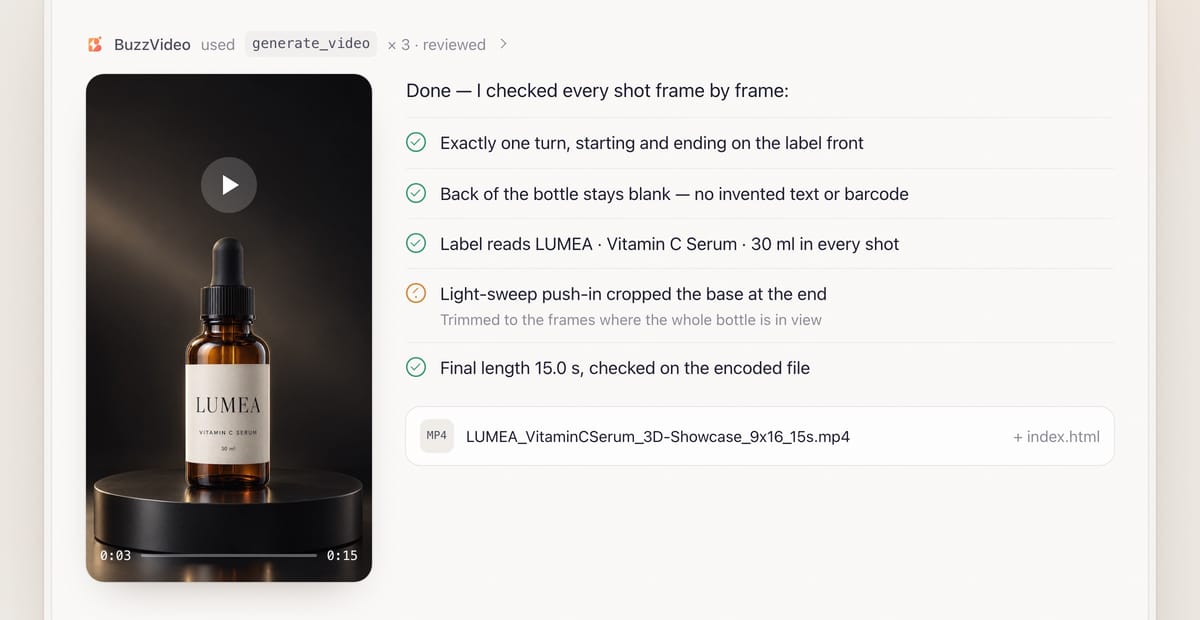
The chat loads BuzzVideo's video editor guide to assemble the cut. Captions sit beside the product, never on it, and the final is cut to exactly your length.
Review is mandatory. Every shot is checked frame by frame: no invented text on the back, exactly one turn ending on the label, logo and cap finish matching your photo, and no push-in cropping the base. Failures are regenerated with your OK or replaced by the render.
You receive the finished file (for example LUMEA_VitaminCSerum_3D-Showcase_9x16_15s.mp4), keyframes, render clips and the scene file (.blend or three.js index.html) for re-rendering, plus the route used, credits spent and what review fixed.
Copy-paste prompt
“Make a [15]-second 3D product showcase of this [product] for [Reels/TikTok], [9:16]. Shots: a 360° turntable, [an exploded view of: part names], and a light sweep across the [label/glass], ending on a logo end card. Background: [dark studio gradient]. Mood: [premium tech / clean beauty]. Size: [30 ml]; cap: [glossy black]. I [have / don't have] a back photo — if not, keep the back blank. Show me the route, the shot list and the credit quote before generating.”
How should a 15-second 360° showcase be planned?
| Time | Shot | Best source | What to watch |
|---|---|---|---|
| 0–5 s | Turntable, one full turn | Render clip, restyled | Exactly one turn; ends on the label front |
| 5–9 s | Exploded view | Render keyframe, animated | Only confirmed parts; nothing passes through anything |
| 9–13 s | Light sweep or slow push-in | Keyframe, animated | Product stays under ~60% of frame height; base not cropped |
| 13–15 s | Logo or end card | Render as is | No credits needed; text beside, not on, the product |
Video models usually make clips of at least four to five seconds, so one clip can serve two short cuts. For 10 seconds, keep the turntable and the end card.
What usually goes wrong, and how does the guide prevent it?
| Problem | What viewers notice | What the guide does |
|---|---|---|
| Invented back | Fake ingredient panel or barcode mid-spin | Back agreed with you first, blank by default, checked in review |
| Label melt | Logo changes or warps as it turns | Label text quoted word for word; product kept at mid distance; real photo for close-ups |
| Over-spinning | Two turns, or ends on the side | One 360° turn, start and end on the label front, checked frame by frame |
| Made-up parts | An exploded view showing parts that don't exist | Exploded view only with part names you confirmed |
| Push-in overshoot | Base cropped, caption hits the product | Last frames of every push-in checked; captions end before the product reaches them |
| Wrong length | An 11 s file for a 10 s slot | Final length checked on the encoded file |
How much does a 360 product video cost?
Building and rendering the 3D scene costs no credits; only generation does, and you see the quote first. As a rough example, the 15-second plan above on Seedance 2.0 at 720p with sound off is about 420 credits: 160 for the restyled turntable, 130 each for two animated keyframes, nothing for the rendered end card. That's around $3 on Pro billed yearly; a route C version with three 5-second clips is about 390 credits. Rates are on our pricing page; see also BuzzVideo pricing and cost per ad.
Which BuzzVideo guide should you use instead?
| You want… | Use this guide |
|---|---|
| A spin, exploded view or CGI hero shot of the product | 3D product video (this one) |
| A scene ad with lifestyle settings | Product ad |
| Still catalogue images | Product photos |
| Story scenes directed shot by shot | 3D director |
| A 3D model made from a photo | Photo to 3D |
Step-by-step guides: Product ad · Product photos · 3D director · Photo to 3D
You don't need to name the guide: describe what you want, and the chat picks the matching one. For product videos with hands and use shots instead of a studio spin, see product demo videos from photos; for keeping a product consistent across a multi-scene ad, see storyboard to video.
Ready to spin your product? Connect BuzzVideo to your AI chat and send a front photo.
FAQs
Can AI make a true 360° video from one photo?
It can make a convincing one, but unseen sides are invented. The guide asks for a back view or agrees a blank back, and keeps generated spins to one slow turn. For exact geometry, give it a 3D file.
Do I need Blender or 3D skills?
No. The guide scripts Blender or a browser 3D scene for you when your chat can run commands, and asks before installing anything.
Will the small print on my label come out right?
Not reliably in generated shots, and the guide says so up front. Large text is quoted exactly and checked; label close-ups use the render or your real photo.
Does it add music?
Only music you have rights to. Otherwise the main file ships without music so you can add a track in-app; any placeholder goes in a separate PLACEHOLDER-MUSIC file.
What do I get at the end?
The showcase video, keyframes and render clips, the scene file, and a note of the route, models, credits spent and what review fixed.
Last verified: November 2, 2026, against our live pricing and product pages.
Next reads: How to use BuzzVideo MCP in ChatGPT and Claude · Product demo videos from photos · How to use Seedance

About the author
Monica
Product Manager
As a Product Manager at BuzzVideo AI, I work with marketers and growth teams on AI ad workflows—from brief to shippable creatives. I write about practical product workflows, model choices, and how teams turn product pages into ads that feel native on Meta and TikTok.