How to Make a SaaS or App Launch Video with AI in ChatGPT or Claude
Turn real screen recordings into a launch, feature or demo video inside ChatGPT or Claude with BuzzVideo MCP: feature list, storyboard, voiceover and edit.
To make a SaaS product launch video with AI, start from a confirmed list of features that exist today, write a 30–45 second script that shows each one working (problem, click, result), record the real product with clean demo data, then add title cards, an AI voiceover, captions and zooms so the UI is readable on a phone. AI should handle the script, voice and polish; the product shots should be real.
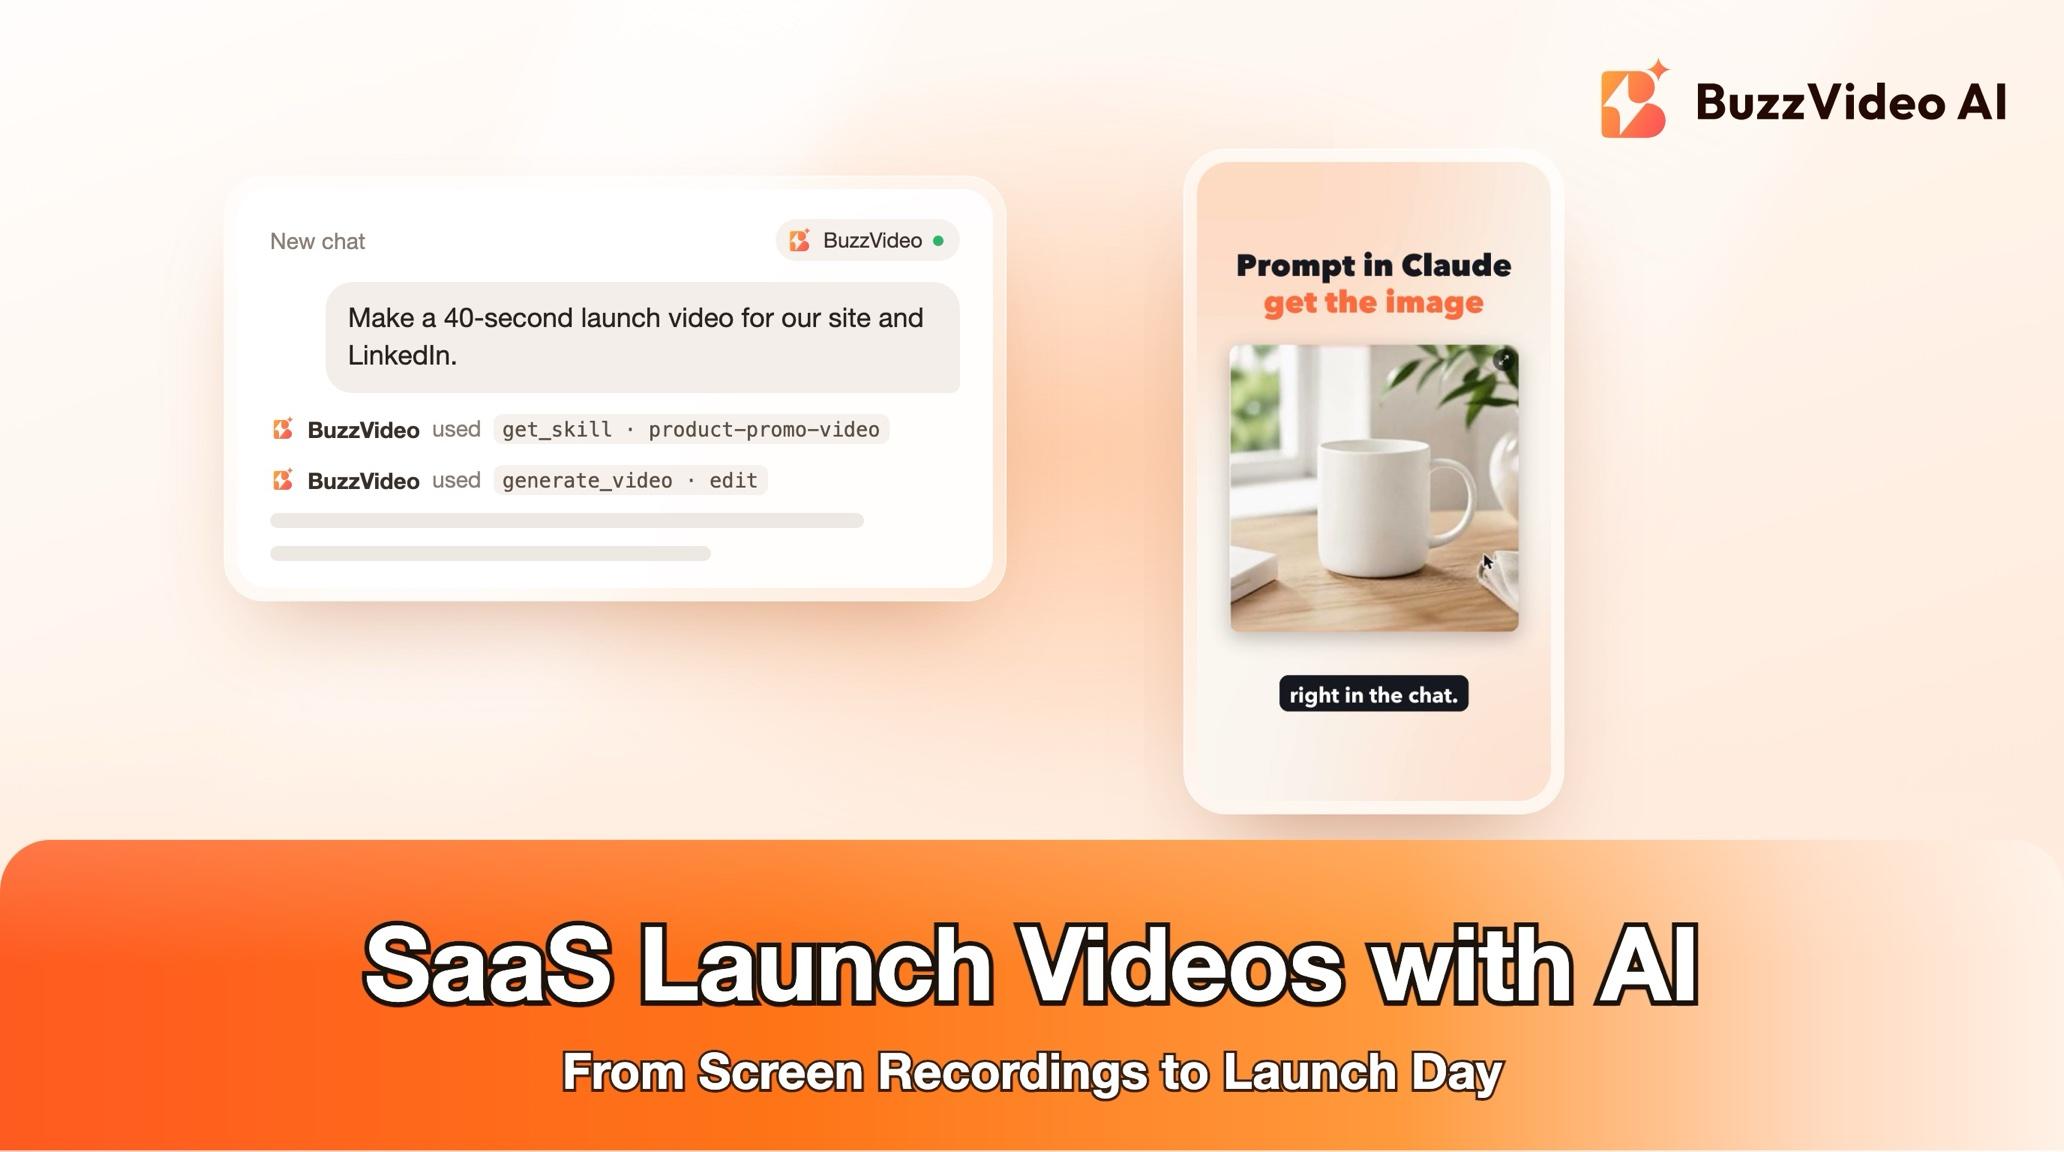
With BuzzVideo MCP connected, ChatGPT, Claude or another MCP client can run that workflow using BuzzVideo's Product promo video guide. It confirms every claim with you, shows the script and storyboard with a credit quote, and never generates fake product screens. To be clear up front: you supply the product, either as screen recordings or as a demo account you sign in to yourself.
What is a SaaS product launch video?
A launch video introduces new software, or a new feature, by showing it in action: a hook, an "Introducing…" title, two to four features demonstrated on screen, proof, and a call to action. The same guide also makes feature explainers, "what's new" videos, walkthroughs, onboarding and tutorial videos, pitch or conference videos, and App Store or Play Store previews for web apps, mobile apps, AI tools and digital services.
| Part | Guide default |
|---|---|
| Length | 30–45 s for a launch or feature video; 60–90 s for a demo |
| Ratios | 16:9 for website and YouTube, plus 9:16 for social |
| Footage | Your screen recordings (or recordings it makes in a demo account) |
| Voice | AI voiceover in your language, with captions |
| Editing style | Fast-cut for social; a calmer launch pace for the website |
Try it: connect BuzzVideo to your AI chat, paste your product URL and the feature you're launching. Connect BuzzVideo MCP →
What do you need before you start?
- BuzzVideo MCP connected: see how to use BuzzVideo MCP in ChatGPT and Claude. Voiceover and generated visuals use credits (pricing).
- Real footage of your product. Either screen recordings, one take per storyboard shot, at full resolution, or a demo or test workspace you sign in to yourself so the chat can record it. It will never type your password for you.
- Clean, fictional demo data: realistic names and numbers, no "test123", no real customer data.
- Sources for every claim: your site, docs or release notes for features, numbers, prices, integrations and customer logos.
- Your brand kit: logo, colours and font for the title cards.
- A chat that can run commands on your computer to render the final video. Without that, you get the recordings, title cards, voiceover, SRT and an edit plan instead.
How do you make a launch video with AI step by step?
Step 1 — Approve the feature list and every claim
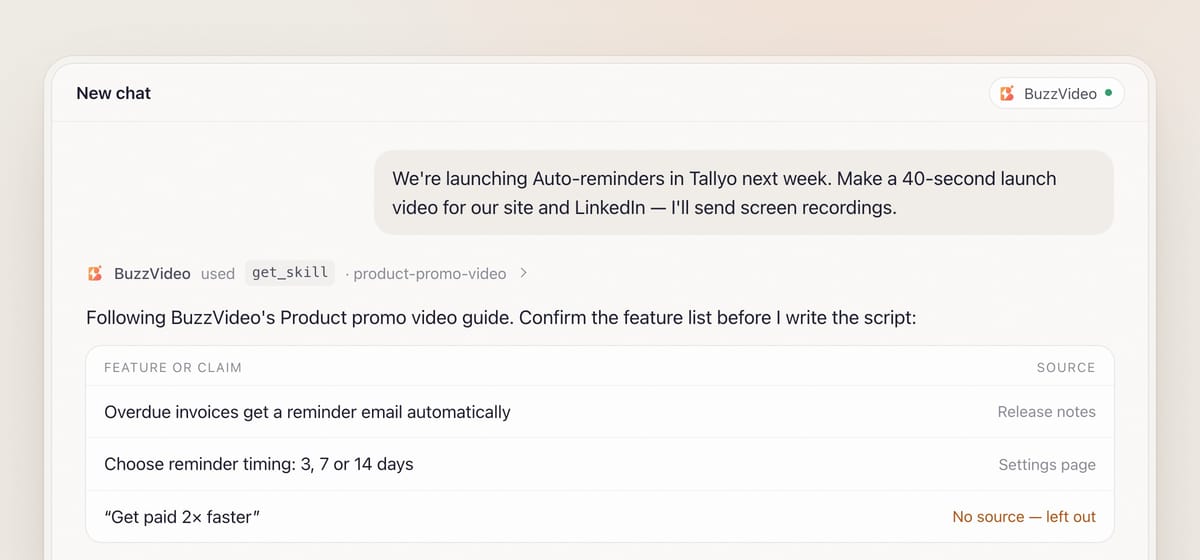
Describe the product, the goal (launch, single feature, full demo, onboarding or store preview) and the audience. The chat loads the guide (list_skills, then get_skill), asks about footage, format and editing style in one round, and gathers facts from the product, your site, docs and release notes if it can browse.
You then get a feature list: feature, one-line benefit, where it lives in the product, and how to show it. Every number, price, plan name, integration, customer logo and award is listed with its source. Anything that can't be verified stays out, and a feature the product doesn't have today never appears, unless you label it a preview or "coming soon".
Step 2 — Approve the script and storyboard
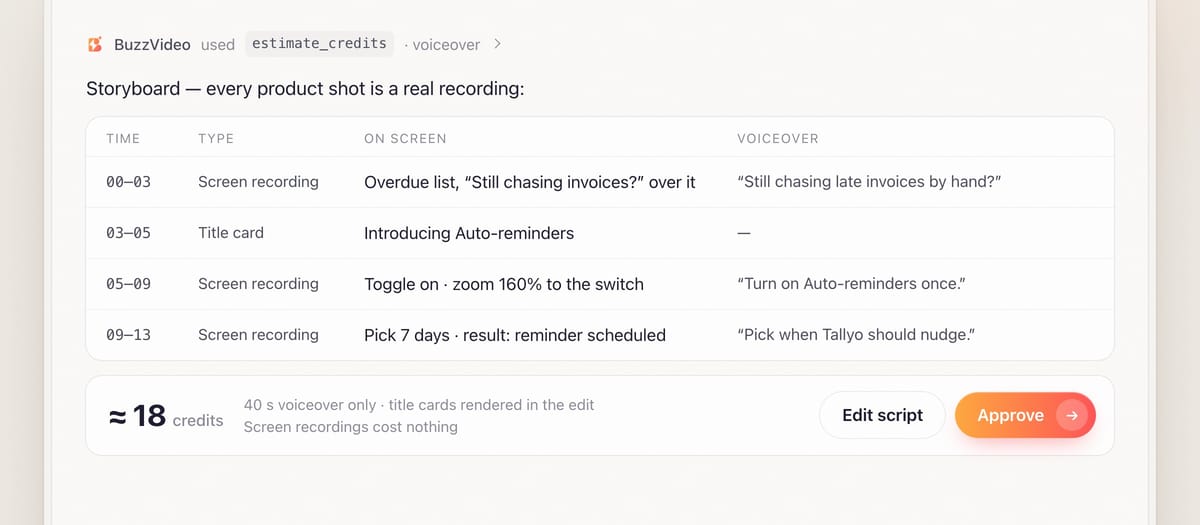
The script follows a fixed shape: hook (0–3 s), an "Introducing" title card, two to four features each shown as problem, click, result, proof from confirmed items only, and a call to action ("Try it free" only if true, store badges only if the app is live there). For social cuts, the real UI or its result is on screen in the first second, with the problem as text over it. Never a plain title card.
Each storyboard row gives the length (UI shots 2–4 s), the type (screen recording, your recording, title card or generated visual), what happens on screen, the zoom or highlight, the voiceover line and on-screen text. You approve it with the credit quote.
Step 3 — Supply or record the screen footage
If the chat can drive a browser, it records in the demo workspace you signed in to: the window sized for the target (for example 1920×1080 at 125–150% browser zoom so text survives on a phone, plus a narrow layout for 9:16), bookmarks and notifications hidden, one short take per action, a slow pointer and a one-second pause on each result.
Otherwise you record, using the checklist it sends. It inspects what you send: if the app window fills less than about 60% of a 1080p frame, text won't be readable on a phone even zoomed, so it asks for a re-record. It also looks for test-environment labels, names and burnt-in captions. If all you have is an old tutorial you can't re-record, it crops each take to one element so names and sidebars stay outside the frame.
Step 4 — Title cards, voiceover and optional mood shots
Title cards (hook, "Introducing…", one per feature, end card with logo and URL) are rendered as images in your brand kit so spelling is exact, kept inside the safe area and off the UI being explained. The voiceover comes from list_voices and generate_audio, one line at a time with word timestamps; you confirm how product names are pronounced. Most preset voices are English.
Generated visuals are optional and limited to moods or the "before" pain, such as a stressed team or a messy spreadsheet on a desk, with no readable UI. The guide never generates product screens, because generated UI text is unreliable and would misrepresent your product.
Step 5 — Edit and review
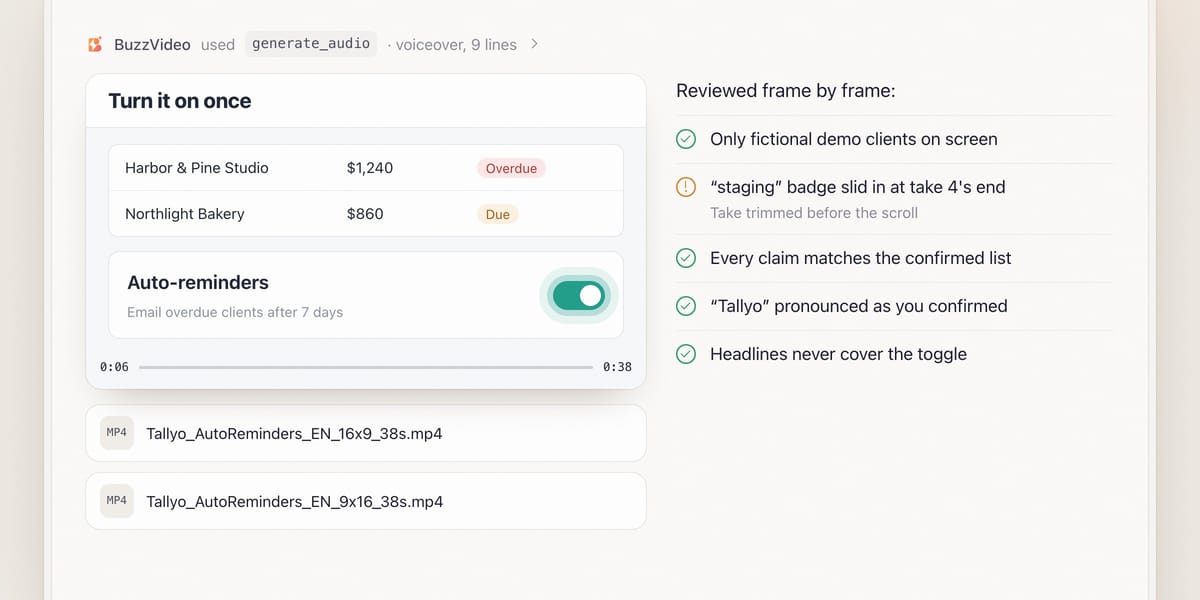
The edit zooms and pans 120–200% into the area that matters, adds a soft pointer highlight or click ripple, speeds up loading and typing, and reframes each UI shot for 9:16 instead of shrinking a desktop screen into a phone frame. It never fakes a result the product doesn't produce.
Review is mandatory and frame-level: no real personal or customer data, no "UAT" or "staging" labels, no workspace names, errors or placeholder text, checked at the first and last frame of every take and the crop edges, because labels slide in during scroll animations. Then every claim is matched to the confirmed list. You get files like Tallyo_AutoReminders_EN_16x9_38s.mp4 and the 9:16 version, plus the script, storyboard, sources, raw takes, title cards, voiceover and SRT.
Copy-paste prompt
“Make a [40]-second launch video for [feature name] in [product name] ([URL]), for [website and LinkedIn], in 16:9 and 9:16, in [English]. Viewers: [small-business owners]. Features in order: [1], [2], [3]. I'll send screen recordings with demo data. Brand kit attached. List every feature and claim with its source first, then show the script, storyboard and credit quote.”
What should your screen recordings look like?
| Setting | Recommendation | Why |
|---|---|---|
| Window | 1920×1080 at 125–150% browser zoom | Text stays readable on a phone |
| 9:16 version | A narrow window or mobile layout | No tiny desktop screen in a phone frame |
| Data | Realistic but fictional names and numbers | No real customers, no "test123" |
| Clutter | Hide bookmarks, notifications, other tabs | Nothing private or distracting on screen |
| Takes | One short take per storyboard action | Clean cuts, easy re-records |
| Pointer | Move slowly; pause about 1 s on each result | Viewers see the click and the outcome |
| Theme | One theme, light or dark, throughout | Consistent look between shots |
What usually goes wrong, and how does the guide prevent it?
| Problem | What viewers notice | What the guide does |
|---|---|---|
| Unreadable UI | Squinting at a tiny screen | Re-record if the app fills under ~60% of the frame; 120–200% zooms |
| Leaked data | A real customer, a name, a balance | Frame-level review of every take and crop edge |
| Test labels | "UAT" or "staging" on screen | Cut, covered, or left out entirely |
| Invented features | The product doesn't actually do that | Feature list confirmed with sources; nothing unverified |
| Fake screens | Gibberish text in a generated UI | Product screens are never generated |
| Slow opening | A logo card before anything happens | Real UI on screen in the first second of social cuts |
How much does a SaaS launch video cost?
Less than most AI video, because the main footage is your own. Screen recordings, title cards and the edit spend no credits. As a rough example, a 40-second voiceover on Seed Audio 1.0 costs about 25 credits. Adding two 5-second Seedance 2.0 mood shots at 720p adds about 260 credits, so the whole video stays around 300 credits, or about $2 on Pro billed yearly. The guide shows the quote before generating anything. See our pricing page.
Which BuzzVideo guide should you use instead?
| You want… | Use this guide |
|---|---|
| A launch or demo video for software | Product promo video (this one) |
| An ad for a physical product | Product ad or 3D product video |
| A topic explained with illustrations, no software UI | Faceless explainer |
| Quick ads from a shop product page | Link to ad |
Step-by-step guides: Product ad · 3D product video · Faceless explainer · Link to ad
Selling a physical product instead? See product demo videos from photos.
Ready to launch? Connect BuzzVideo to your AI chat and send your product URL and recordings.
FAQs
Can the AI generate my product's screens for me?
No, on purpose. Generated UI text is unreliable and would misrepresent your product, so every product shot comes from a real recording. AI is used for the voiceover, title cards and optional mood shots without UI.
Do I have to give the AI my password?
No. If the chat can drive a browser, you sign in to a demo or test workspace yourself. It never enters passwords for you and doesn't record real customer data.
Does it work for mobile apps?
Yes. Send a simulator or device screen recording; it is used directly for the 9:16 version and store previews. Store badges appear only if the app is live in that store.
What if I only have an old tutorial recording?
The guide can work from it: it makes a frame sheet, lists every risky frame with timecodes, and crops each take to a single element so names, sidebars and labels stay out of shot.
Can I get both a website and a social version?
Yes. The default is 16:9 for your website or YouTube and 9:16 for social, each reframed separately, with a calmer pace for the website and fast cuts for social.
Last verified: November 2, 2026, against our live pricing and product pages.
Next reads: How to use BuzzVideo MCP in ChatGPT and Claude · Best AI video generators for marketing · What is BuzzVideo AI?

About the author
Monica
Product Manager
As a Product Manager at BuzzVideo AI, I work with marketers and growth teams on AI ad workflows—from brief to shippable creatives. I write about practical product workflows, model choices, and how teams turn product pages into ads that feel native on Meta and TikTok.